
How to Add a Printer to a Mac : Step-by-Step Guide 2025
Apple has achieved a new milestone, revealing in a special event about over 100 million active users. People love to use Macs and create amazing things to fully cherish the functions of these devices. Adding a printer to your Mac is one of these essential tasks.
Especially when people have different printing devices that may include a printer at home, the question of “How to add a printer to a Mac” still pops up. Whether you are using a Mac for the first time or have never been required to print through it, don’t fret. You are in the right printer experts’ hands.
Let’s make sure your Mac knows how to talk to your printer. This blog will walk you through the process of adding your printer quickly and painlessly. So, grab a cup of coffee and get your printer up and running.
How to Add a Printer to a Mac?
Before opening your Mac, ensure your printer is ready to go. Connect the power cable to the printer and turn it on using the power button.
Check the manufacturer‘s website to find your printer’s compatibility with the Mac model. If your printer is brand new, make sure you’ve installed the ink cartridges or toner. Most printers come with simple instructions (written in a manual) to help you do this.
Load some paper in the paper trays, so you’re all set for a test print. If you have a Wireless printer, connect it to Wi-Fi or your home network. The setup process of connecting your printer to Wi-Fi varies by brand.
Now that your printer is ready, add it to your Mac. Whether you’re using a USB cable, a Wi-Fi connection, a Bluetooth-enabled printer, or an IP address, I’ll cover each option
Method 1: Adding a Printer via Wi-Fi (Wireless Printer)
Knowing how to add a printer to a Mac is one of the macOS basics that every Mac user should know. Once your printer is connected to Wi-Fi, adding it to your Mac device is super simple. Here’s a step-by-step process to make things easy for you.
Step #1: Open System Settings
- Click the Apple menu in the upper-left corner of your screen.
- Select “System Settings” (or “System Preferences” on older Macs).
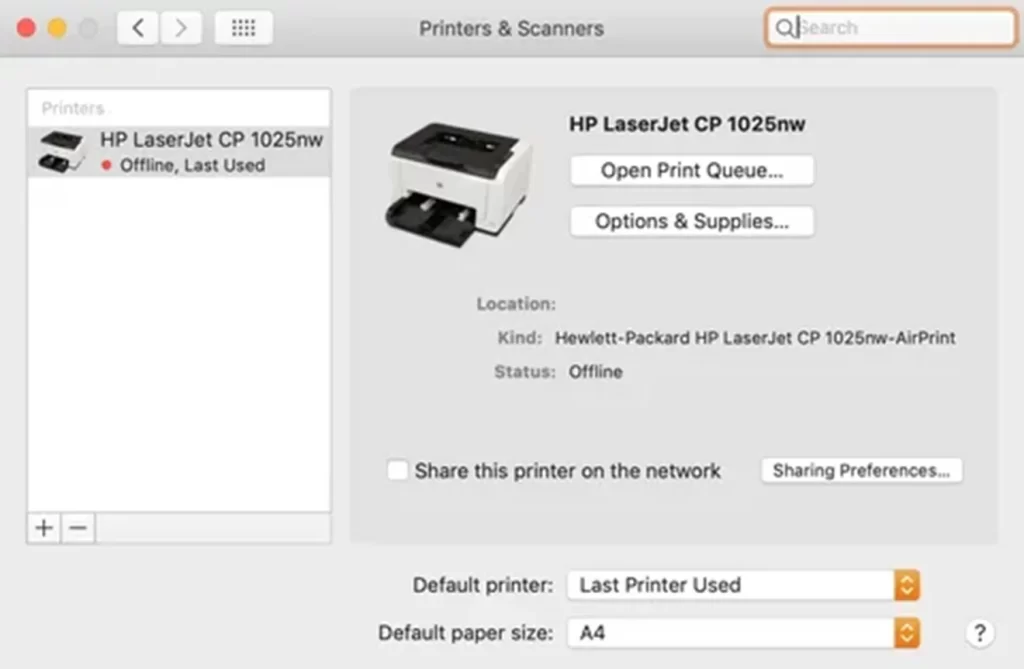
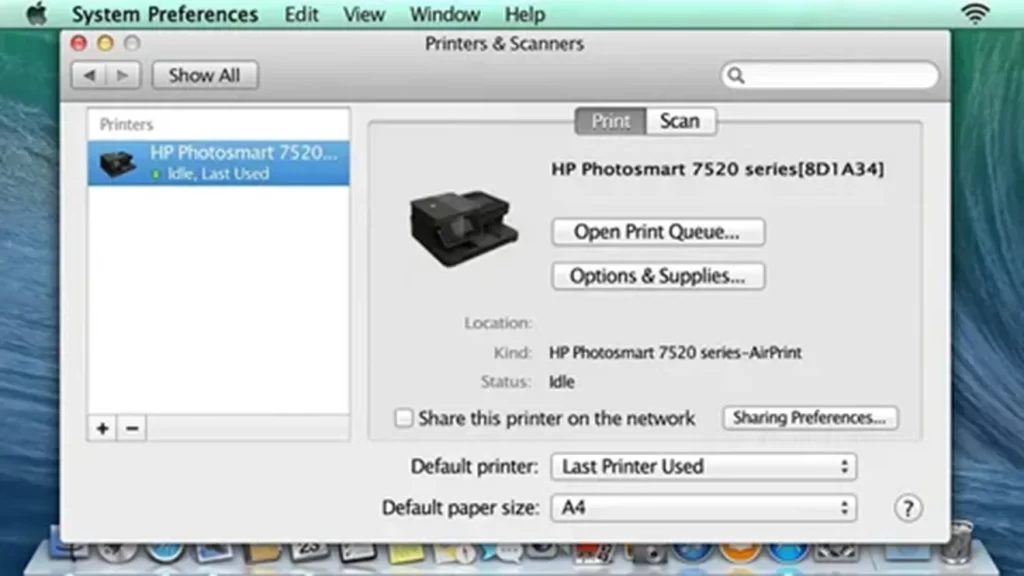
Step #2: Go to Printers & Scanners
- Scroll down and select “Printers & Scanners.” You will see a list of all printers that are currently connected to your Mac.
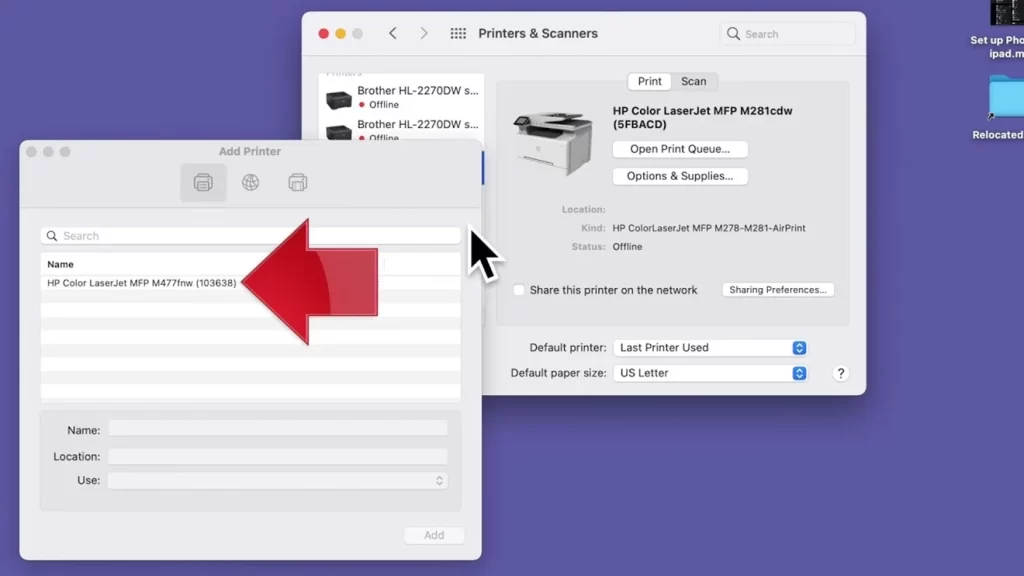
Step #3: Add Printer
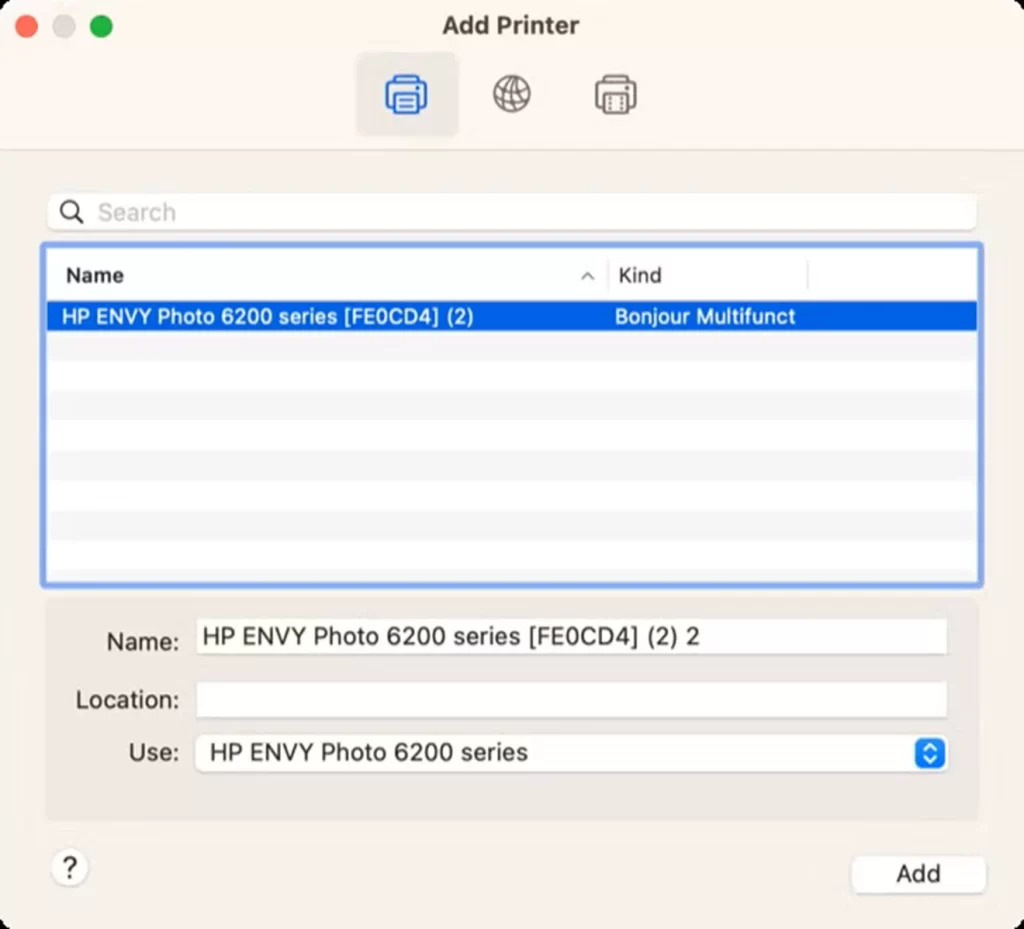
- To enter the Add Printer box, click the “+” button under the printer’s list.
- Your Mac will automatically start scanning for nearby printers.
Step #4: Select Your Printer
- Once you see your printer in the list, click on it.
- If your printer is AirPrint-enabled, you will automatically connect it right away by clicking on Add.
- If it does not support AirPrint, select your printer, then Add and Download Printer Drivers from Apple Servers. The drivers should download automatically.
Step #5: Confirm Installation
- After the setup finishes, your printer will appear in the Printers & Scanners window.
- You can print a test page to make sure everything’s working.
Method 2: Adding a Printer via USB Cable
Sometimes, the best solution is the simplest one, and nothing is above the USB cable connection (a reliable way to connect your Mac to your printer).
Step #1: Connect the Printer to Your Mac
- Plug one end of the USB cable into the printer and the other into your Mac.
- If your Mac has USB-C ports, you will attach a hub or dock if the printer is not USB-C.
- If you haven’t already, turn on the printer.
Step #2: Wait for Automatic Detection
- Your Mac might automatically detect the printer and prompt you to install it. If so, just follow the on-screen instructions.
- If your Mac doesn’t recognize the printer immediately, visit the System Settings > Printers & Scanners section and click the “+” button.
Step #3: Add the Printer
- Select your printer from the list that appears and click “Add.”
- If a software driver is needed, your Mac will download it automatically.
Step #4: Print a Test Page
- Print a quick test page to confirm that the connection works.
Method 3: Adding a Printer via Bluetooth
If you have a Bluetooth-enabled printer, you can easily pair it with your Mac device. It’s a mess-free printing method as you have put on Wireless headphones.
Small photo printers and label printers work on the same principle. Here’s how you can add them to your Mac:
Step #1: Enable Bluetooth on Both Devices
- Make sure Bluetooth is turned on both on your Mac and your printer.
Step #2: Pair the Devices
- Go to System Settings > Bluetooth on your Mac.
- Find your printer in the list of Bluetooth devices and click “Connect” or “Pair.”
Step #3: Add the Printer
- Once paired, go to System Settings > Printers & Scanners and click the “+” button.
- You should see your Bluetooth printer listed. Select it and click “Add.”
Method 4: Add a Printer to Mac via IP Address
Last but not least, a fiery way to add your printer to your Mac is through its IP address(or hostname). If you don’t know how to find the printer IP address, it’s super easy.
Look for this information by logging into the router’s admin page and looking at the IP addresses of connected devices. Once you have an IP address in hand, let’s dive into the following steps:
Step#1: Open System Settings
- Visit the System Settings > Printers & Scanners and click the Add a New Printer, Scanner, or Fax.
- Click the web icon at the top of the window and type the printer’s IP address into the Address box.
Step #2: Select Protocol and Driver
- Choose a protocol – AirPrint if it’s an AirPrint printer; otherwise, choose Internet Printing Protocol (IPP), LPD, etc.
- Wait for the printer to appear, then click the ‘Use Menu” and select a driver.
Step #2: Add Printer
- Click the “Add” button to connect to the printer.
Conclusion
And there you have it! How to add a printer to a Mac: no matter the method of connection you decide to use, it’s easy. By following the above simple steps, you can start pulling documents, photos, or anything you want to print.
Well, next time you find yourself in need of a physical copy of something, you will not be confused as to how to get it done.